Licensed Version
In addition to the free version of Coslat 2FA, this section will explain the second verification settings with Google Authenticator.
With Coslat 2FA, for users who want to connect to the VPN, a second verification can be made with SMS or Google Authenticator. In this way, an additional measure will be taken against VPN passwords being stolen.
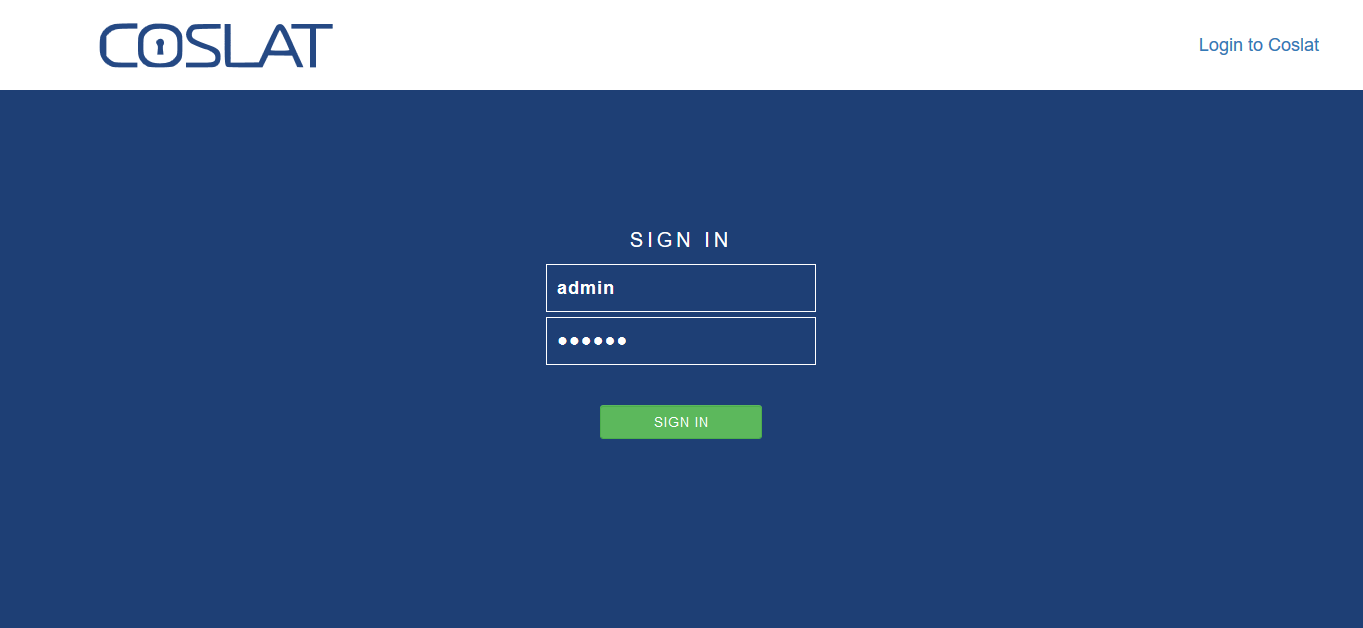
After the 2FA installation process is completed, the web interface is accessed with the received ip address. User name: admin, password: coslat as login.
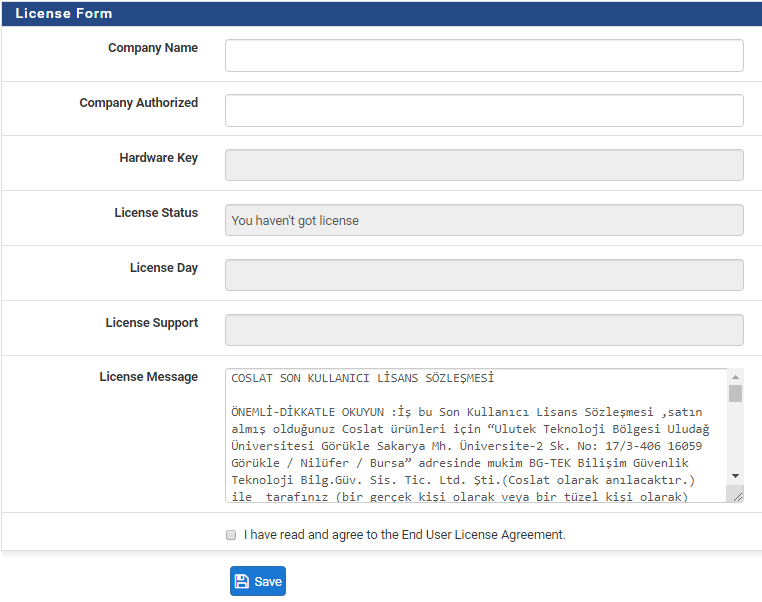
LICENSING
After entering the company name and company authorized information, it is accepted by accepting the license agreement and clicking the Save button.
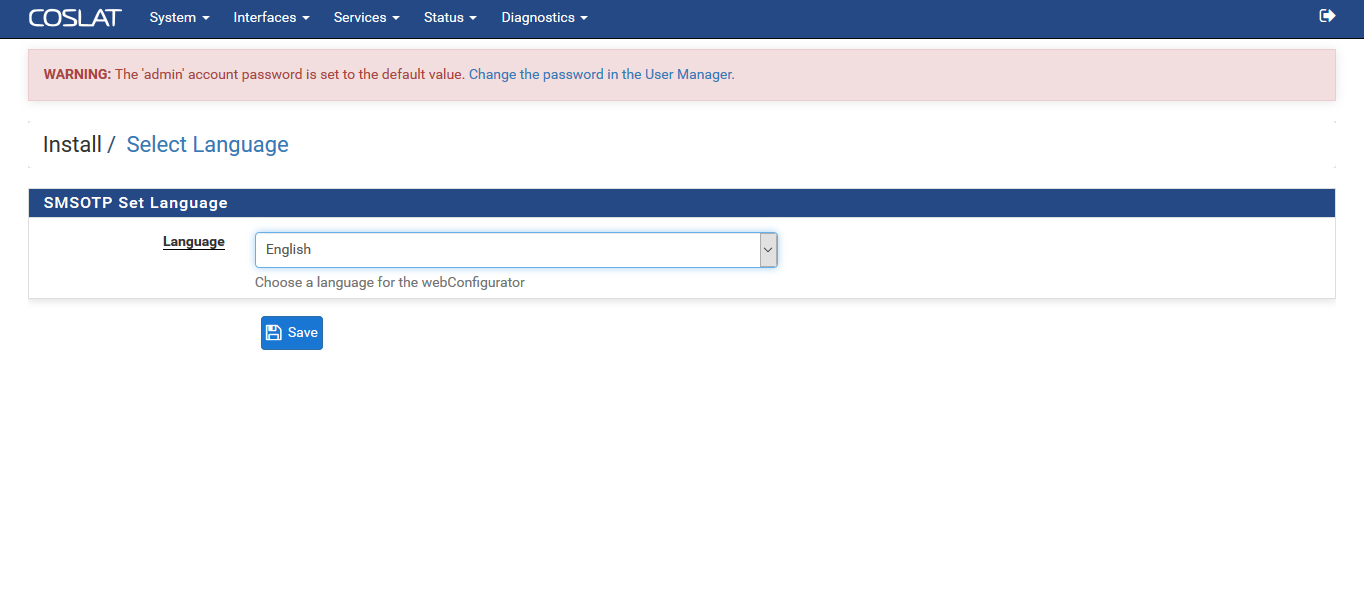
Clicking on the Coslat text will start the wizard.

On the first screen that comes up, we select the language we want to use and continue by clicking the “Save” button.
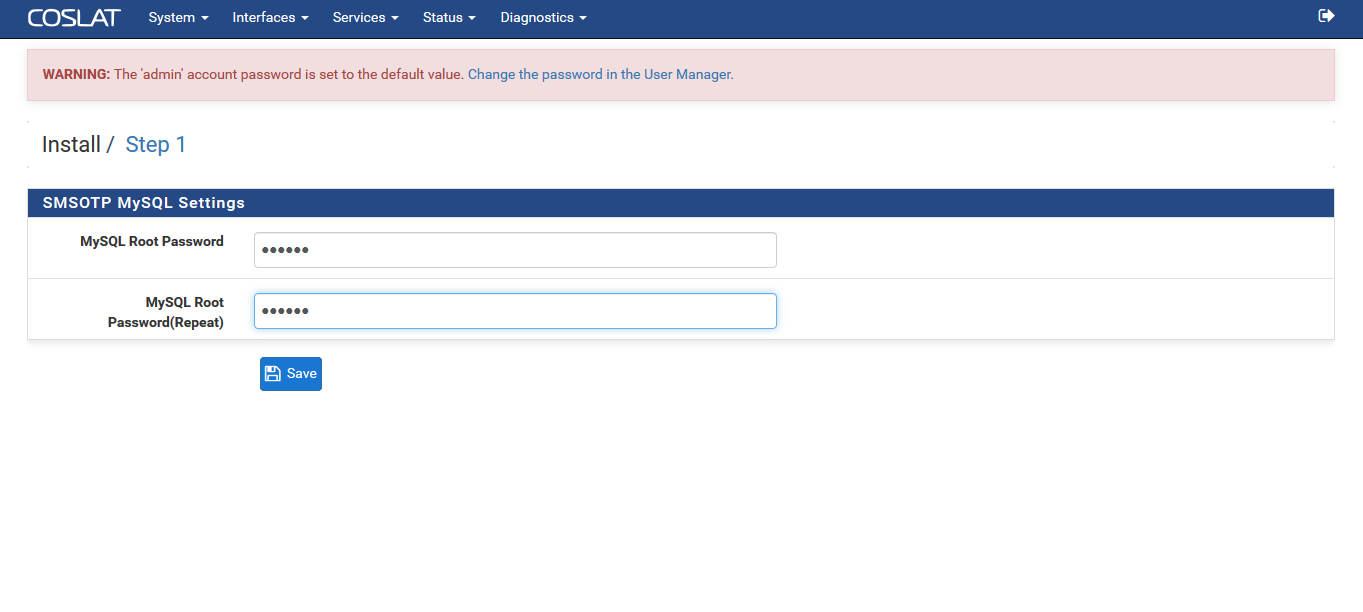
In this screen, a password for MySQL service have to be defined and continued by clicking on the “Save” button.
After entering the License Key taken from Coslat authorities, click on the “Save” button and go to the next step.
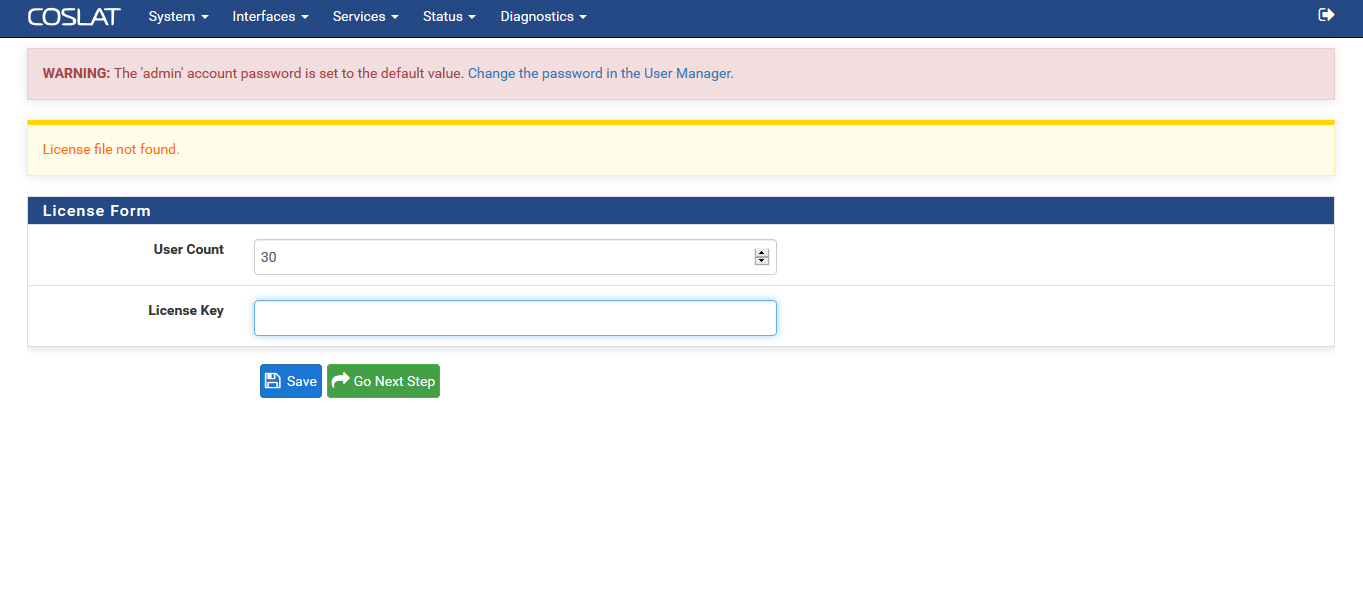
Clicking the “Go Next Step” Button, it is proceeded to the next step.
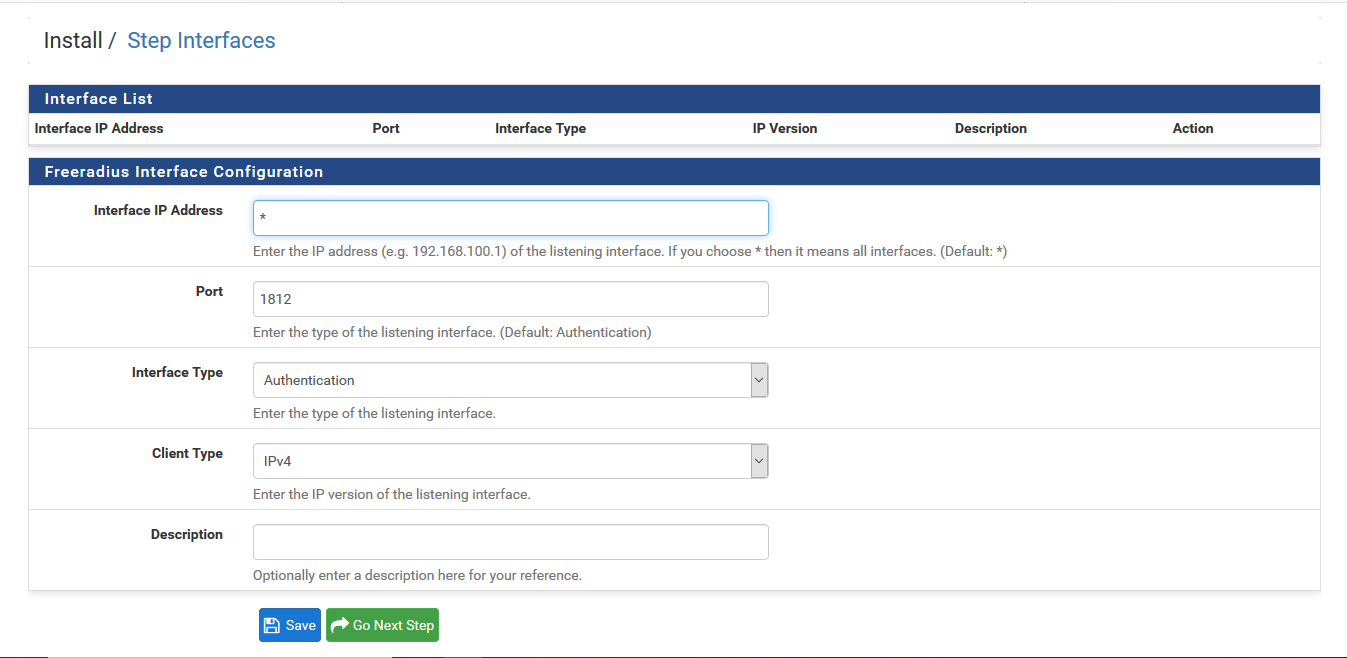
Interfaces Selection
We need to create interfaces where the system will respond to incoming requests. At this point, we need to add two ports for Radius Authentication and Accounting. We use port 1812 for Authentication and port 1813 for Accounting.
First, the Authentication interface is selected as an Interface Type and 1812 is written on the port text area.
Interface selection is performed by selecting Interfaces Type Authentication and click “Save” button.
Next, the Accounting interface is selected as an Interface Type and 1813 is written on the port text area and click “Save” button again.
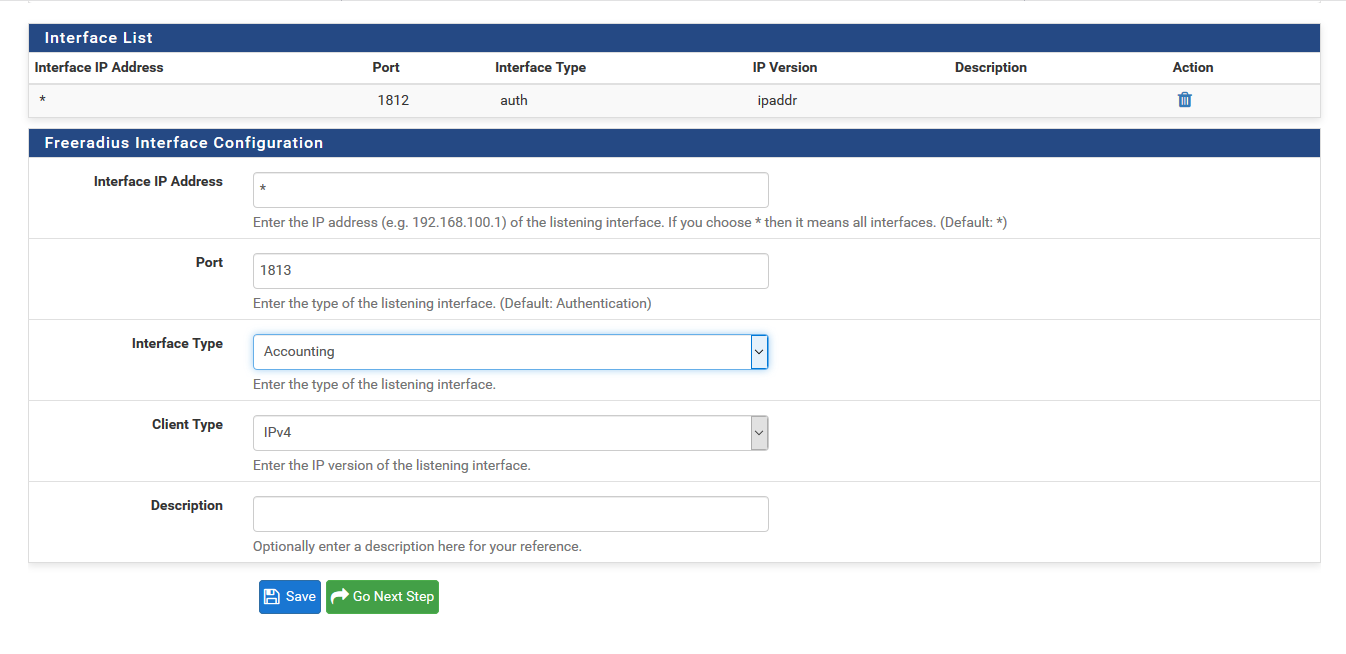
Clicking the “Go Next Step” Button, it is proceeded to the next step.
On The Configure Client Page;
Client IP Address: VPN server ip address.
Client Shortname: A descriptive name for the VPN server.
Client Shared Secret: This is the password field required for communication between the VPN server and Coslat 2FA.(This Secret will also be defined by the VPN server.)
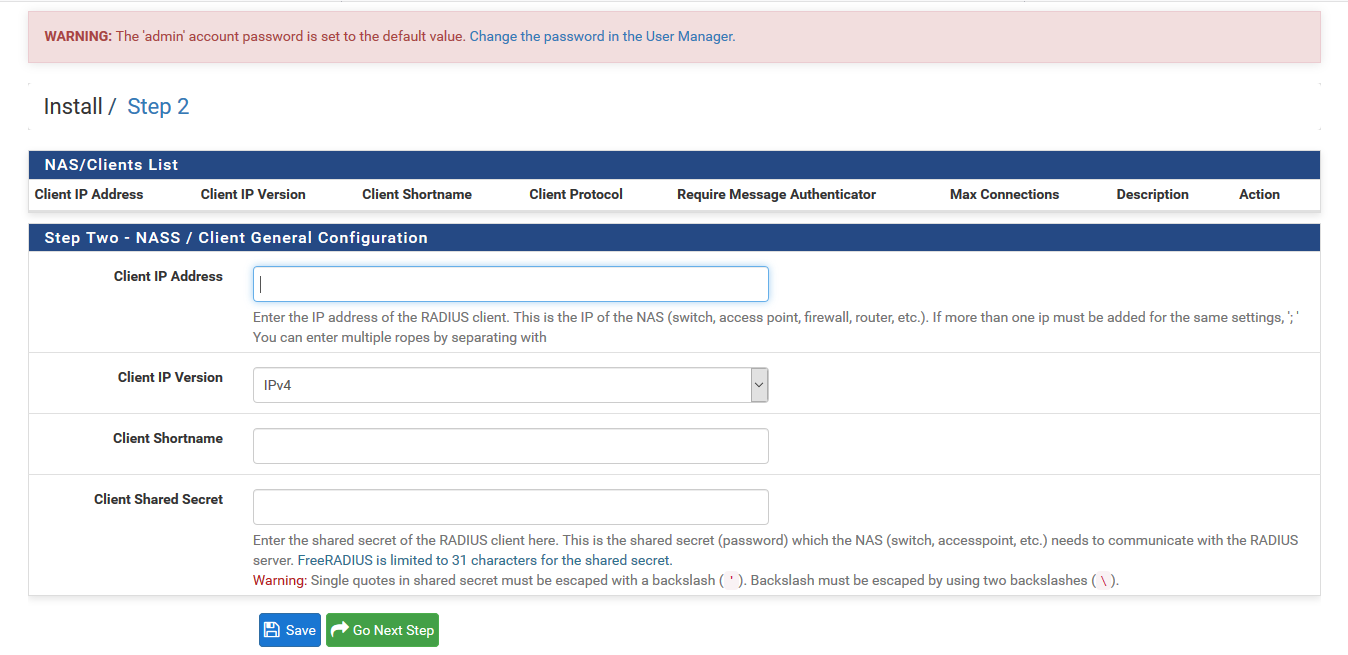
After saving the settings with the “Save” button, for the next step click “Go Next Step” button.
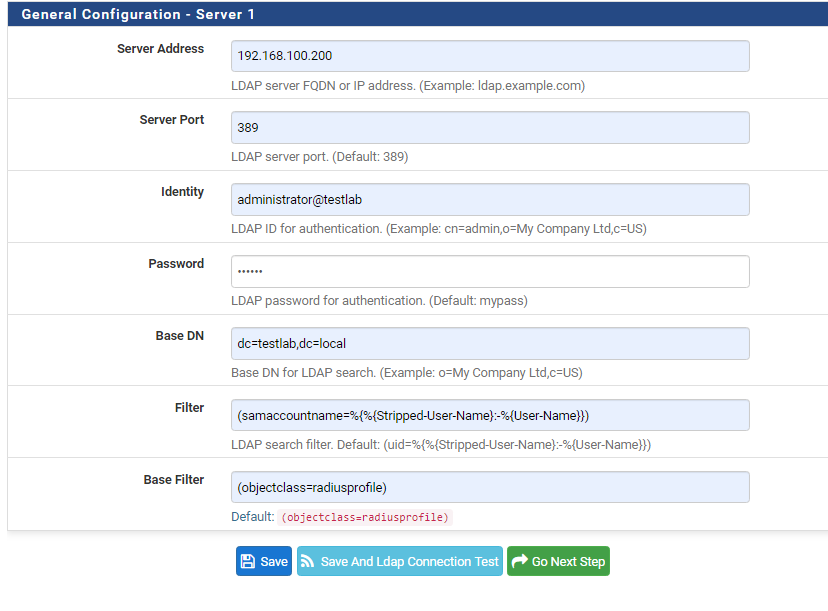
If you want Active Directory integration, we can fill in and complete the information according to the following example. If you want to skip this step, you can skip this step by clicking the “Go Next Step” button.
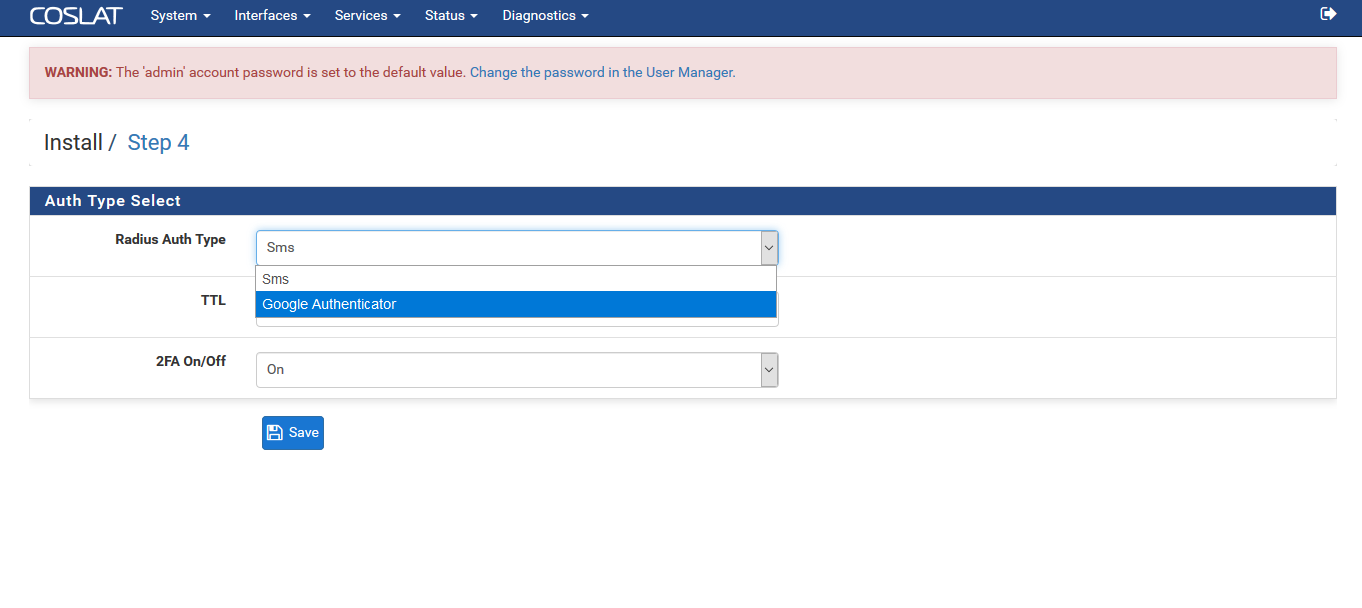
Secondary Verification Method Selection (SMS / Google Authenticator)
The secondary verification method Sms or Google Authenticator can be selected here.
For secondary verification method selection;
Radius Auth Type: Secondary authentication method is selected.
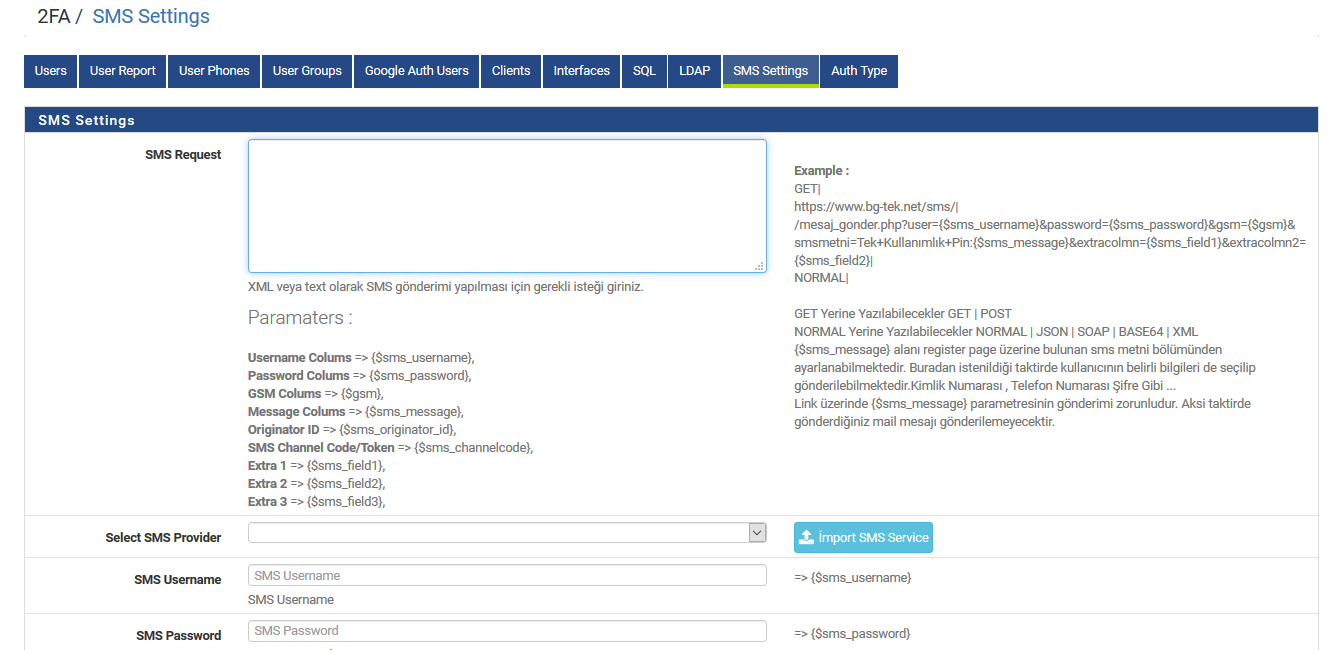
For sending SMS;
Provider settings must be done in order to send SMS to users. For this;
Select SMS Provider: If the SMS provider you use is available in the system, it can be selected from SMS provider drop down box.
SMS Request: IIf the service provider you use is not listed, the service provider API information is added. (You can contact BG-TEK support team about this and get help with API.)
SMS Username: SMS provider username (provided by the provider)
SMS Password: SMS provider password (provided by the provider)
Other information varies by SMS provider.
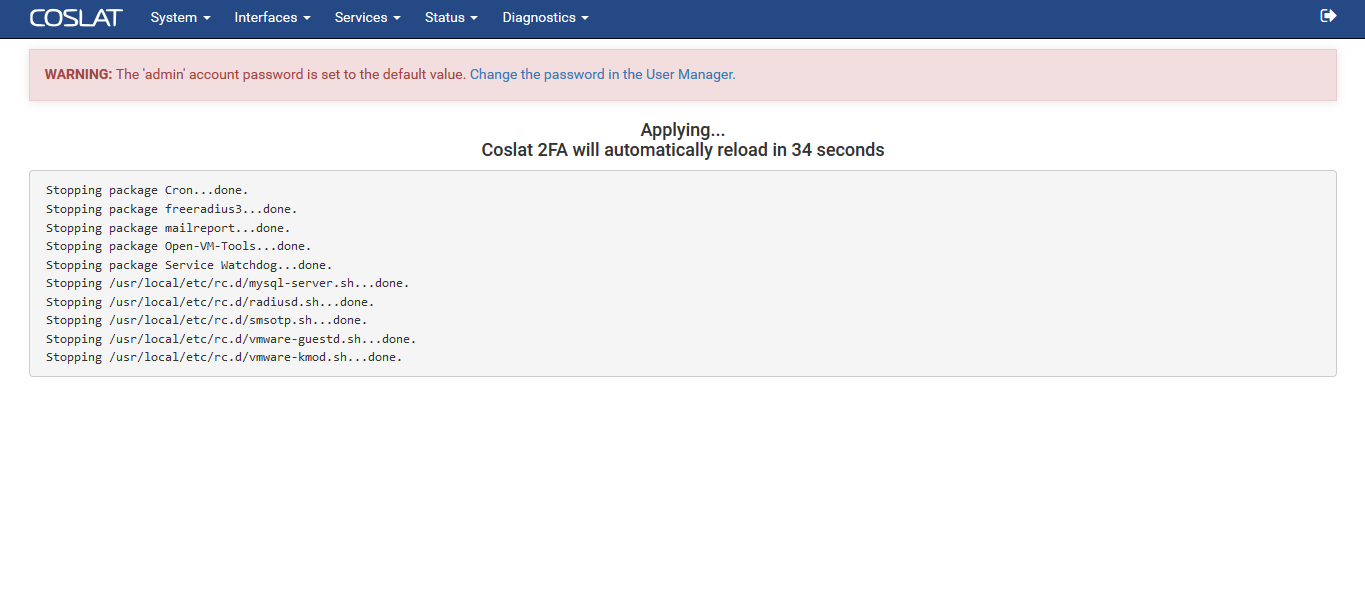
After entering the information, clicking the “Save” button, Coslat 2FA installation is completed and the device is waited for a restart.
Adding a local user
After making database, interface and verification method settings, Coslat 2FA is ready to use with local users.
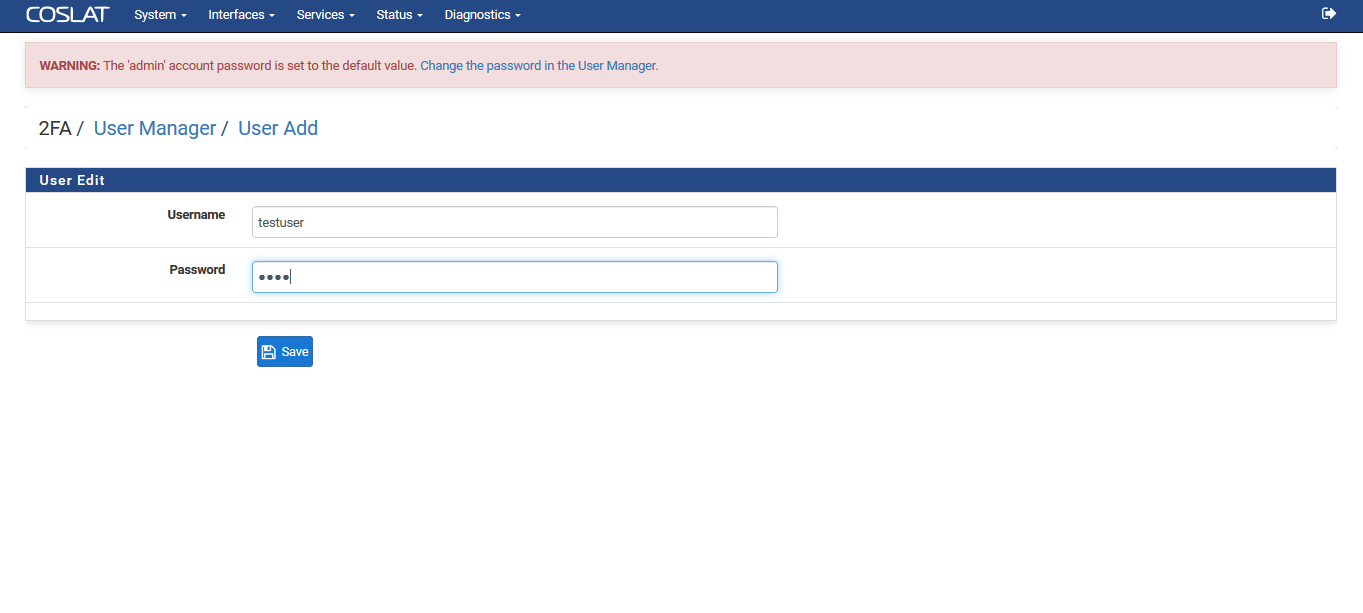
For adding user; Click Users -> + Add button
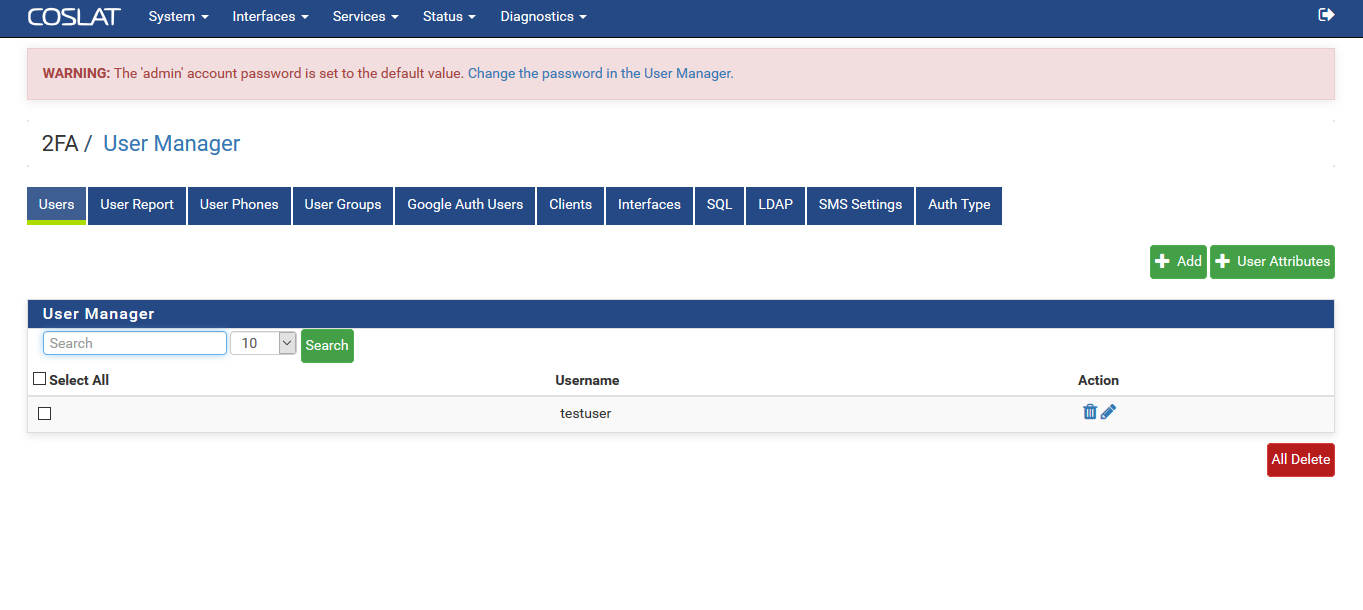
Enter Username and password and click “Save” button.
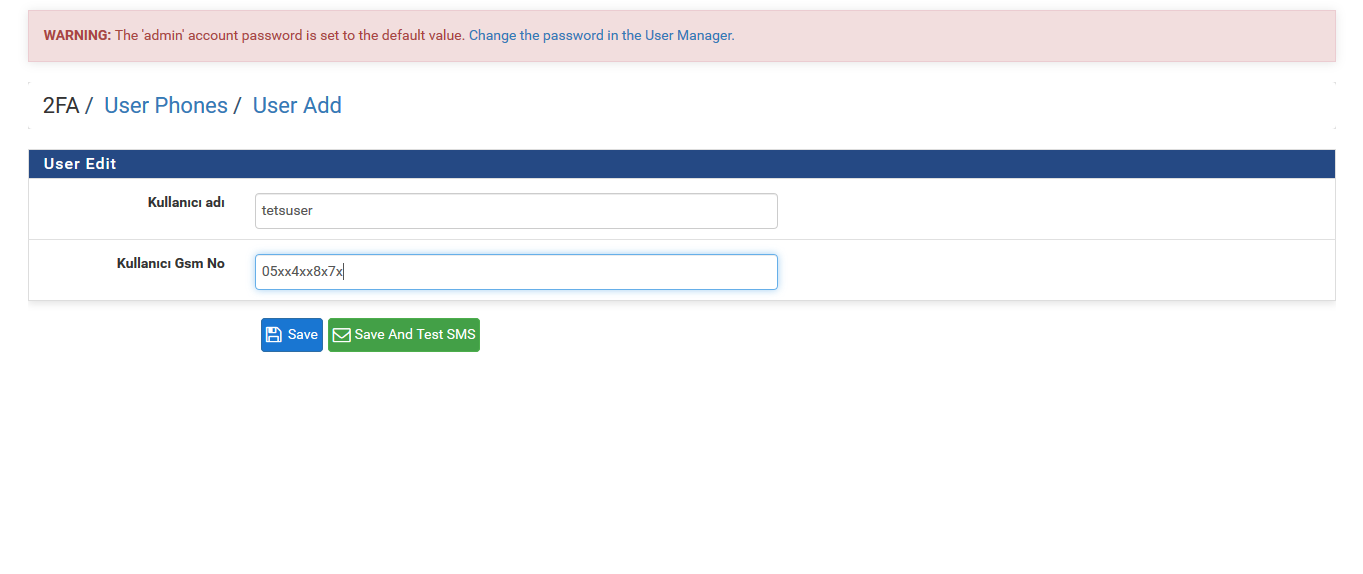
To be able to define mobile phones to the users we add;
Click User Phones -> + Add button.
Username: Username previously opened.
User GSM No: User’s mobile phone.
Clicking the “Save” button.
For Google Authenticator;
Auth Type: -> Google Authenticator is selected for Google Authenticator verification.
Then, in order to add code to the Authenticator application that users use, users need to login through the link below and introduce the QR code.
Attention: Please set the necessary access settings for users to access this link in your own structure.
“ https://….ipadresi/api/radius_get_qrcode.php ”

You can access the QR code generation screen from the links above as http or https to Coslat’s Web interface.
After entering the user name and password, a specially created QR code screen will appear.
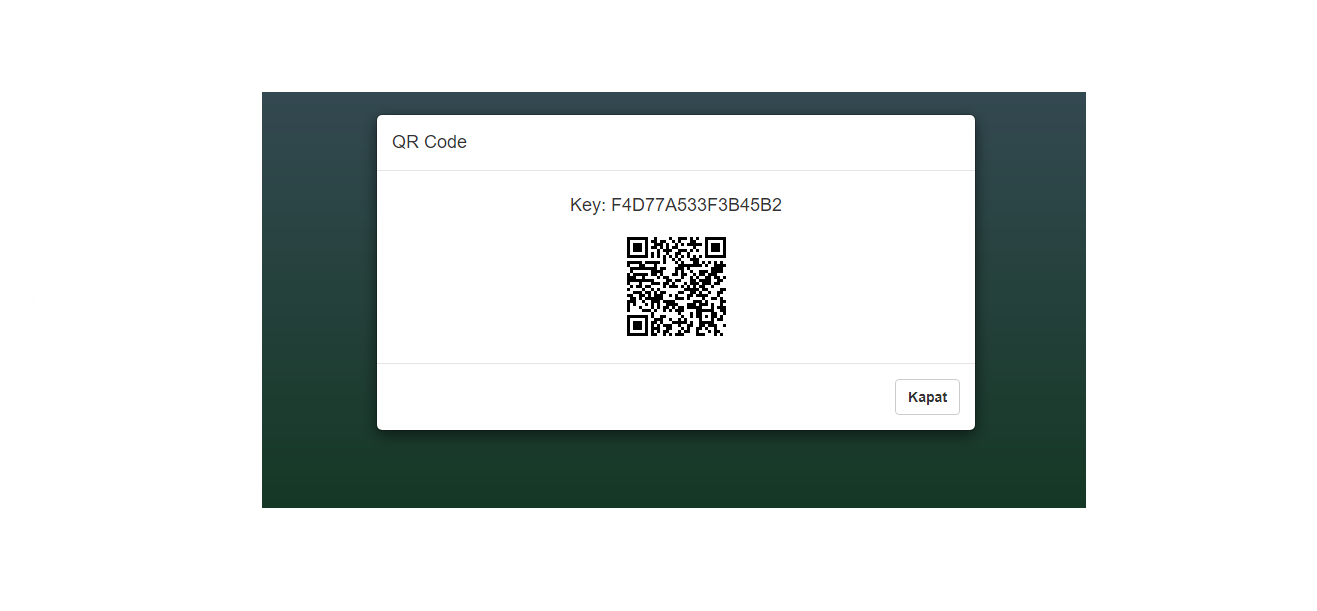
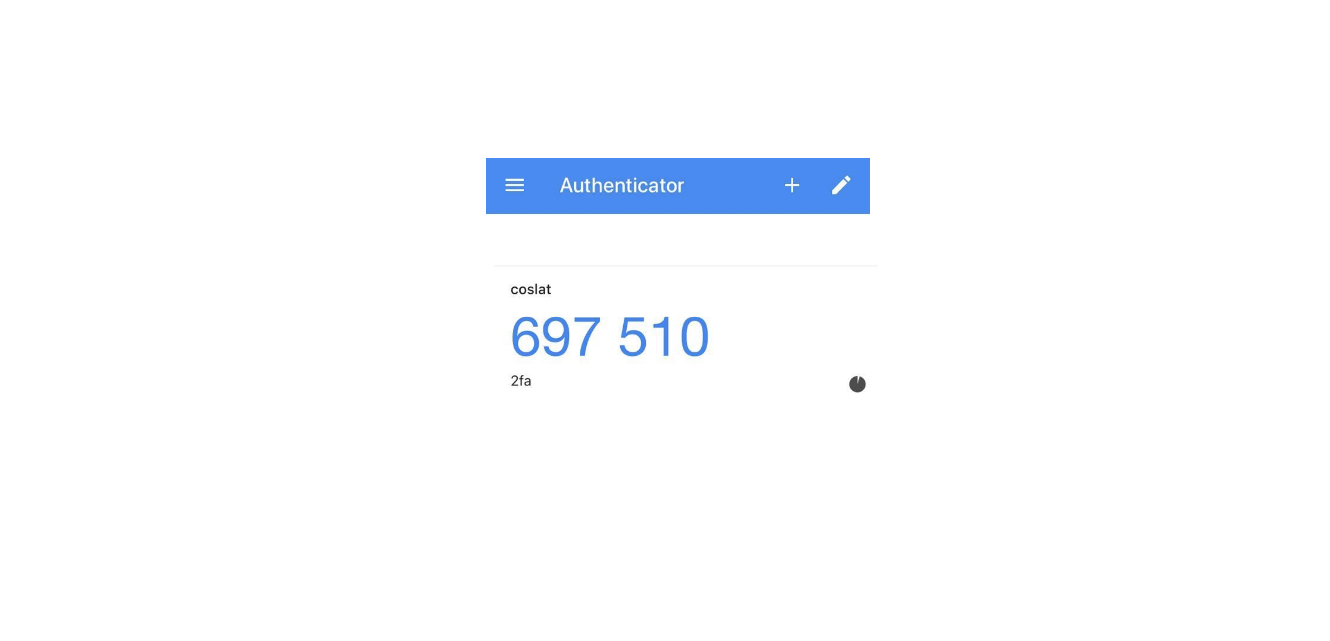
After adding the QR code, it will appear as Coslat 2FA in the application.
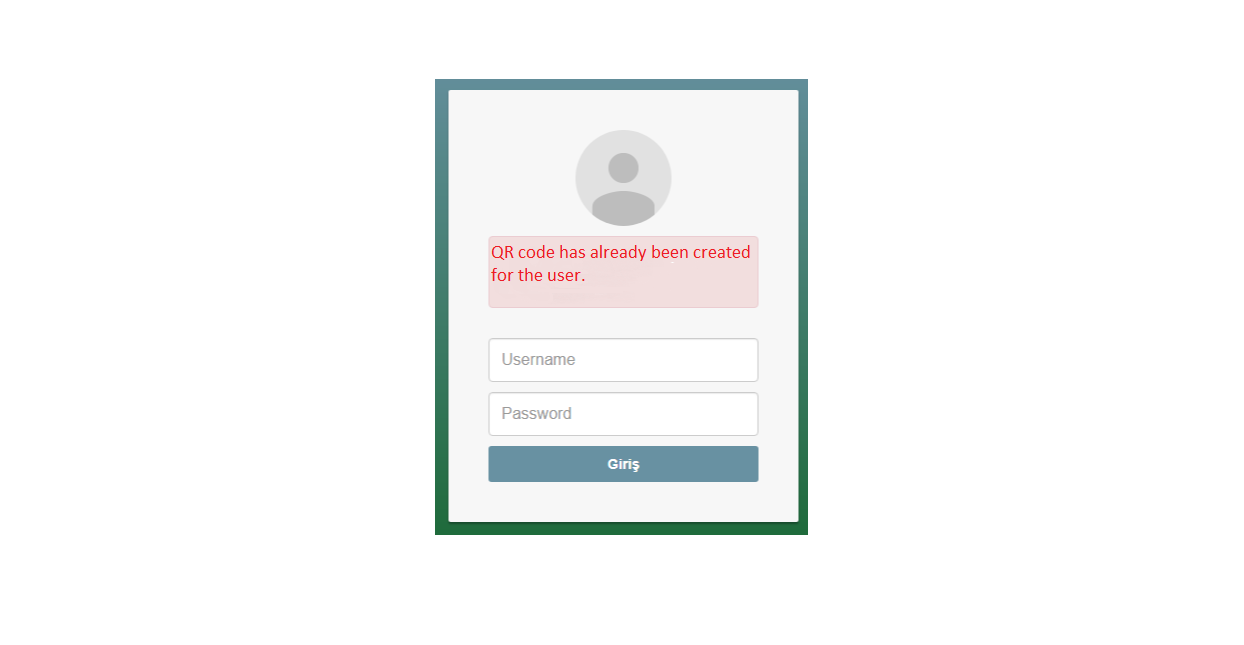
Attention: The user can not get the code once again after receiving it. For this, the user must be deleted and re-created.
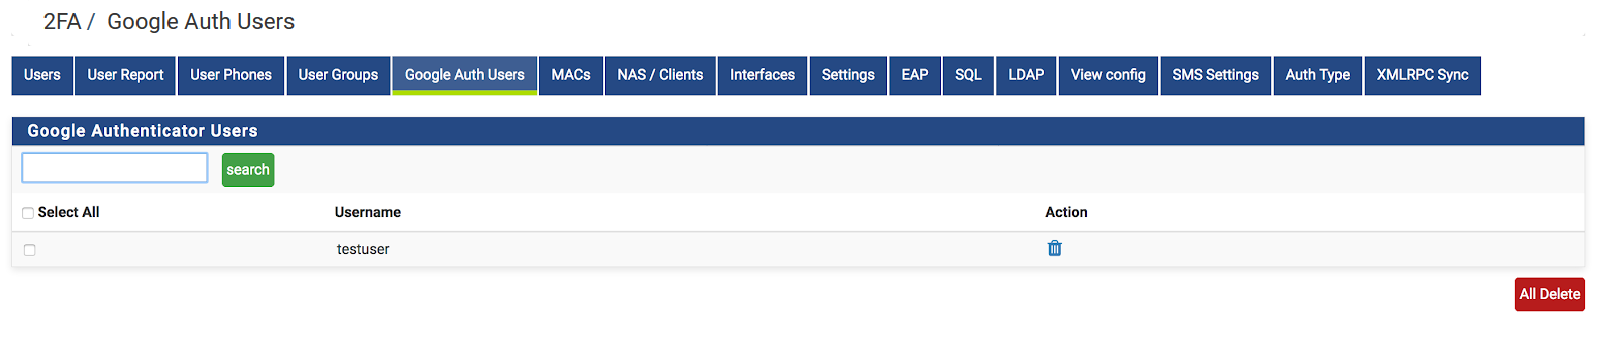
The list of users who have received QR code appears on the Google Auth Users tab.
The settings on Coslat have been completed.